Two Level Deck Framing: How Builders Assemble Height Transitions Step by Step
If your backyard has a slope, a pool, or an awkward grade change behind the house, a flat single-tier deck fights the yard instead of working with it. Two level deck framing solves that problem by stacking or stepping two separate platforms, each with its own structure, connected by stairs or a short transition. This guide walks through how a two-tier deck actually gets framed, step by step, so you can follow what your deck builder is doing and ask the right questions at each stage.
This is a build-sequence guide, not a weekend DIY plan. Structural framing, footing depth in Henderson's caliche-heavy soil, and ledger attachment to the house all fall under permit and inspection rules in Clark County and the City of Henderson. Use this article to understand the process and check the work, and leave the structural decisions to a qualified deck builder or engineer.
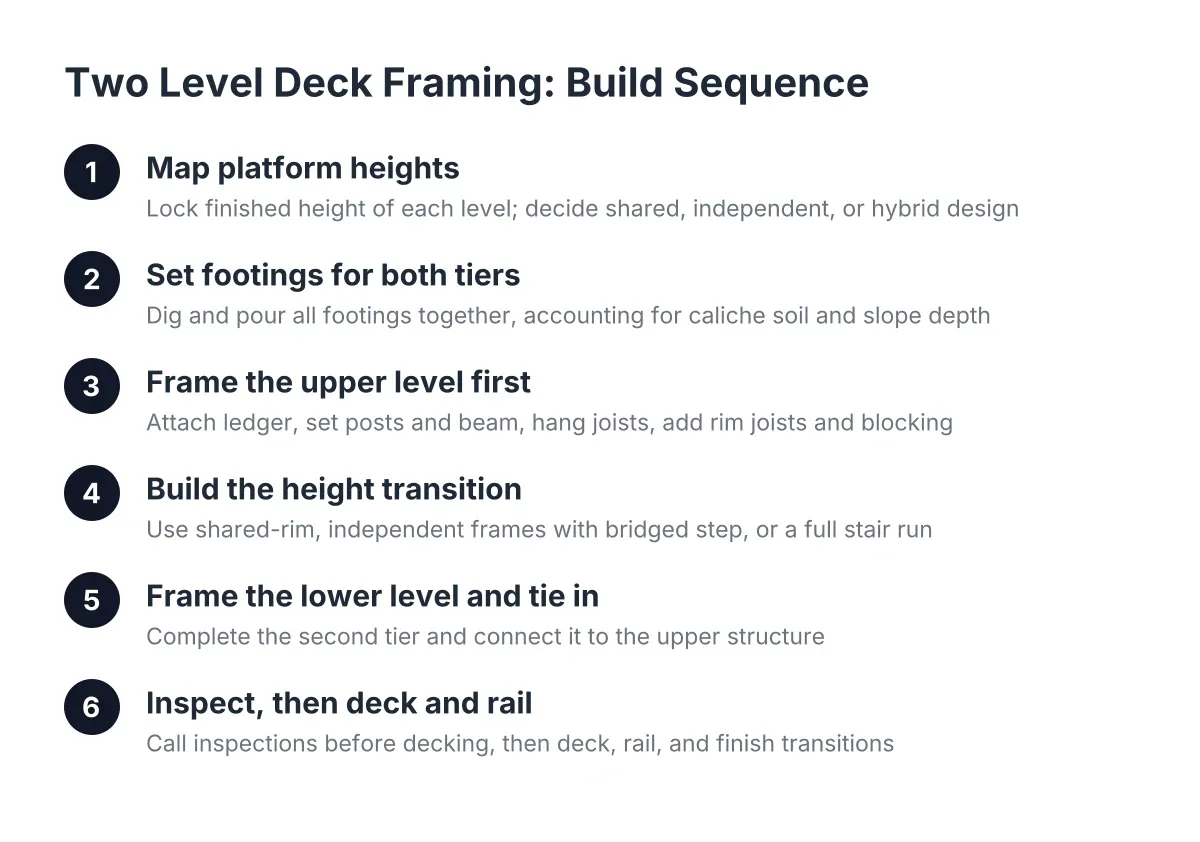
Step 1: Mapping Two-Level Deck Framing and Platform Heights
Start with a scaled drawing that locks in the finished height of each platform. Everything downstream, footing locations, post heights, beam sizes, and stair runs, depends on those two numbers. In a typical Henderson layout, the upper level sits at the height of the back door threshold and the lower level steps down toward the yard or pool deck.
Decide how the levels will relate to each other:
- Shared-structure design. The lower level hangs off the upper level's framing on one side. This keeps the gap between tiers clean but makes the two platforms structurally dependent.
- Independent platforms. Each level stands on its own posts and beams, connected only by stairs. This is the more forgiving approach for split level deck framing because each tier can be inspected, repaired, or resurfaced on its own later.
- Attached upper, freestanding lower. The upper deck ties to the house with a ledger while the lower deck floats free near the pool or patio. This is common when the lower tier wraps a pool, where you want structure kept clear of the pool shell.
This is also the stage where multi-level deck design earns its keep. Zoning the upper tier for dining under a patio cover and the lower tier for lounge seating or a hot tub changes the framing plan; a hot tub deck needs tighter joist spacing and often extra beams, so that decision has to happen on paper, not mid-build.
Submit the plan for permit review before ordering lumber. In master-planned Henderson communities, HOA design review usually runs on its own timeline, so start both reviews early.
Step 2: Set Footings for Both Tiers at Once
Dig and pour every footing for both levels in one mobilization. Desert soil here often hides caliche, a cement-hard layer that can turn a one-hour hole into a half-day fight with a breaker bar or core drill. Hitting it once, with the right equipment on site, beats discovering it again on a second trip.
Footing depth and diameter come from the approved plans, and the inspector typically wants to see open holes before concrete goes in. For the lower tier on a sloped yard, expect the downhill footings to be deeper or wider than the uphill ones because they carry taller posts.
A practical note on ground-hugging tiers: if the lower platform sits close to grade, some of the ground level deck ideas you see online skip posts entirely and bear beams on ground-contact blocks. In this climate that can work for a detached low platform, but the plans and inspector decide, not a photo gallery.
Step 3: Frame the Upper Level First
Build the tier attached to the house before anything else. The ledger board bolts to the house rim with through-bolts or structural screws, flashed so monsoon-season runoff cannot sit behind it. Even in a dry climate, a bad ledger flashing detail is the most common structural failure point on attached decks.
From the ledger, the sequence runs:
- Set posts on the poured footings and cut them to the beam height.
- Install the beam, either on top of the posts or notched into them per the plans.
- Hang joists from the ledger to the beam with joist hangers, at the spacing the decking requires.
- Add rim joists and blocking, then square and brace the frame.
Joist spacing matters more in the Mojave than in milder climates. Composite and PVC boards soften in extreme surface heat, so many manufacturers call for tighter spacing than wood would need. Confirm the spacing against the decking you actually chose, not a generic chart. And if you are wondering whether you can use 2×6 lumber for deck framing, the honest answer is only for short spans on low platforms; most two-tier builds need deeper joists, and the span tables in the approved plans govern.
Step 4: Build the Height Transition Between Tiers in Two-Level Deck Framing
The drop between levels is where two level deck framing gets interesting, and where sloppy builds show. There are three common ways to handle it.
Shared-rim transitions in two level deck framing
With a shared-structure design, the lower level's joists hang from a doubled rim or flush beam on the upper frame. The drop between tiers equals one or two step heights, usually created by dropping the lower joists on a lower beam or by framing a box step into the rim. The advantage is a tight, clean seam between tiers. Additionally, the tradeoff is that the connection hardware carries real load, so every hanger and fastener has to match the plan.
Independent frames with a bridged step
With independent platforms, each tier is framed as its own complete deck, and a step or short stair bridges the gap. This is the standard approach for two tier deck framing on sloped yards because each frame can sit level on its own footings regardless of what the ground does between them. It also keeps a future deck repair simple; a crew can resurface or reframe one tier without touching the other.
Full stair runs between distant tiers
When the levels differ by more than a step or two, code requires a real stair with consistent riser heights, proper stringers, and a graspable handrail. Two level decks with stairs need the stair landing framed and footed like a small deck of its own. Plan stair placement early; a stair that dumps foot traffic into the pool equipment pad or the only shaded corner of the yard is a design miss that framing cannot fix later.
Step 5: Frame the Lower Level and Tie It Together
With the transition method settled, frame the lower tier the same way as the upper: posts, beam, joists, rim, and blocking. Check that the finished surface of the lower tier will land exactly one riser height, or a full stair run, below the upper surface once decking thickness is added. Measuring to the frame instead of the finished surface is the classic error that produces a trip-hazard half step.
For example, suppose a homeowner in Green Valley has a yard that drops about two feet from the back door to the pool. A typical crew would frame an attached upper tier at door height for dining, then an independent lower tier near the pool with three steps between them. That layout keeps the pool-side platform freestanding, separates the cooking zone from wet feet, and leaves room for a patio cover over the upper tier later.
Then add the details that make a two-tier frame last in the desert:
- Blocking under every decking seam and picture-frame border.
- Joist tape on top of joists and beams to protect fasteners from heat cycling.
- Hardware rated for exterior exposure at every hanger and post connection.
- Extra framing at railing post locations so posts bolt to structure, not just to a rim board.
Step 6: Call Inspections Before Decking Goes Down
Schedule the framing inspection while the structure is still open. The inspector needs to see hangers, ledger bolts, post bases, and the transition framing between tiers. Once deck boards cover the frame, verifying any of it means pulling boards back up.
This checkpoint protects you as the homeowner. If you are the kind of buyer who got burned by a vague quote or a contractor who disappeared after the estimate, a passed framing inspection is hard evidence the structure matches the plans you paid for. It also matters at resale; according to the 2025 Zonda / National Association of the Remodeling Industry Cost vs. Value Report, a wood deck addition recoups 95% of its cost at resale and a composite deck recoups 89%, but only when the structure holds up to a buyer's inspection.
Step 7: Deck, Rail, and Finish the Transitions
With framing approved, decking goes down on both tiers. In Henderson, board choice is a heat decision as much as a style decision; dark composite boards get painfully hot in summer sun, so lighter, heat-reflective composite or PVC colors make the lower pool-side tier usable barefoot for more of the year.
Railing comes last, and it is where split level designs either look intentional or look stitched together. Run the same railing style across both tiers, carry the handrail continuously down the connecting stairs, and confirm which edges require guards; any surface more than a code-defined height above grade needs a guardrail, which often means the upper tier is railed while a near-grade lower tier stays open.
What This Process Means for Your Project
Two level deck framing is a sequence problem more than a carpentry problem. Plan both tiers together, pour all footings at once, frame from the house outward, nail down the height transition before the lower tier exists, and inspect before anything gets covered. A builder who walks you through this order before quoting is showing you how the job will actually run.
One honest tradeoff to weigh: a second tier adds footings, posts, stairs, and railing, so a two-level deck costs more per square foot than a single platform of the same total size. On a flat lot with no zones to separate, a single-level deck with a patio cover may serve you better. On a sloped Henderson yard or a backyard built around a pool, the second tier is usually what makes the outdoor living space work at all.
If you need deck construction, Henderson Deck Co can help.
Prefer to talk it through? Call (725) 425-5179 — a quick call is usually the fastest way to get a straight answer for your situation.